

Network Setup
Name: VPN-SITEA-83 Name: VPN-SITEB-81
LAN: 172.1.1.1/24 LAN: 172.1.2.1/24
WAN: 166.155.25.83 WAN: 166.155.25.81
PSK: VPNorbitdemo PSK: VPNorbitdemo
This guide will walk you through the secure setup of the Orbit device and creating a single P2P IKE/IPSEC Tunnel. The above diagram shows two remote tunnels and using this guide you should be able to easily duplicate a second tunnel or more if necessary.
*When implementing a live tunnel, I do not recommend you use the 172.x.x.x addressing referenced in this guide.
This guide was written by Phillip A. Yancey of BCI Technologies.
If you have any issues or need support, call me at 407.847.8848 X 204
GLOSSARY
Setup IPsec Conn.
Secure Orbit Setup
System/User Authentication/Actions/Change Password

When setting up a cellular device it’s important to change the default password.
Since in this example our device will be using a public static IP address once active the default firewall allows https access.
*Make sure you type everything correctly and don’t forget your password. There are no back doors and if you forget your password the unit must go back to GE for re-flashing.
System/User Authentication/Basic Config/General

Consider decreasing login attempts and lockout time for added security.
Expand Password Options to further tighten password requirements.
*By default, non-admin users are already disabled.
System/General/Basic Config/Registration

Setup a device name that helps identify your device better. Site A and WAN IP ending in 83.
Disable the Run First time web wizard to keep it from popping up when logging in.
Setup a pre-login banner to show warnings or identification indicators when on the login page.

Example of Login banner and Device name.
Example of Login Banner.
Example of previously entered Device “name” field.
Services/DHCP Server/Basic Config/General

Make sure to disable DHCP by unchecking the enable box. (If not being used)
You may want to also delete the default DHCP policy to remove unnecessary configurations and avoid confusion later.
System/Time/Basic Config/Timezone

Having accurate time is important for accurate alarm and events logging. While the device will update from the cellular network it’s also wise to set a Timezone Location just in case.
Interfaces/Bridge/Basic Config/IPV4

The bridge is a layer2 MAC (media access control) linking other bridge devices together. By default, all interfaces inside Bridge are trusted and connected via MAC locally. Cell interfaces are never inside the bridge and therefore not trusted by default.
When outside the bridge an interface becomes a layer3 routed interface.
In this example we have changed the default Orbit IP address of 192.168.1.1/24 to our SITE_A address of 172.1.1.1/24
*Remember when changing a device IP we must also change our local machines IP. In this case our computer is using 172.1.1.100/24
Cellular Interface Setup
*SIM Cards should only be inserted into the Orbit when it’s powered off.
Interfaces/Cell/Status/Cellular

Once the device is setup, configured and secure, let’s move onto the Cellular Interface.
Check the Cellular status to see if your device and SIM are provisioning on the network properly.
Look at MDN or Mobile Device Number
*If a MDN doesn’t appear, you need to call provider support.
Look for APN or Access Point Name
*If APN doesn’t show you may need to wait longer, check antenna signal, or manually configure.
*It may work but if the IP address doesn’t match, you’re static then it’s being dynamically assigned and may keep changing.
Interfaces/Cell/Basic Config/Cellular/Connection Profile

Verizon uses the following APN's per region.
ne01.vzwstatic (North East)
nw01.vzwstatic (North West)
so01.vzwstatic (south)
mw01.vzwstatic (Midwest)
we01.vzwstatic (West)
At&t uses the following APN,Type,& Usage.
phone Smartphones
broadband Laptops and tablets
nxtgenphone Voice over LTE
m2m.com.attz IoT Devices
wap.cingular Legacy APN
i2gold Mobility, Uses static IP addresses.
IPSEC tunnels are great for small or test cellular applications but we recommended you consider a Private APN when scaling Cellular Networks. This is enclosed and encrypted non-internet routed networking.
Example: This unit is not pulling correct APN so we’ve manually configured to ensure it obtains the correct Static IP address.
Interfaces/Cell/Basic Config/IPV4/

Older Orbit Firmware may not automatically enable certain Cellular settings. Make sure to verify the following settings and ensure they are already configured.
Example:
Enable IPV4 On Cellular Interface
Enable DHCP On Cellular Interface
Enable Point to Point Connection on Cellular Interface
IPV4 will allow the Cellular interface to be configured.
DHCP will ensure a static or dynamic address is assigned.
Point to Point Connection will change how the devices routes traffic and must be disabled or un-checked.
Interfaces/Cell/Basic Config/Filter/

Make sure IN/OUT_UNTRUSTED firewall rules are configured to ensure (GE default) we do not trust traffic from the Cellular interface.
IN/OUT_UNTRUSTED policies will allow DNS, HTTPS, and NAT Masquerade “MASQ” for immediate Internet access.
*Changing the default password is important, but also consider disabling the Cellular interface when not being used during testing.
Interfaces/Cell/Basic Config/NAT

NAT is not used on the Cellular Interface when adding tunnels. Remove MASQ if showing under NAT Source.
REMOVE by deleting and committing changes.
*If MASQ is enabled once the tunnel is in operation you won’t be able to access remote LAN devices. MASQ is good to treat WAN address as local addresses. In the case of a tunnel, this breaks our IKE/IPSEC endpoint exchanges which use WAN addressing.
Interfaces/Cell/Status/IPV4/

In this example, we compare dynamically assigned IP verses static IP addressing.
Since our device did not automatically receive the correct Static APN the device received a dynamic IP of 10.128.158.194
Once our APN was manual configured, we received the correct IP of 166.155.25.81
In this Example we should be able to access https://166.155.25.81 (Use your static here) via the internet.
*Your ISP should provide any static or static range assignments in advanced.
*The goal here is to make sure we can hit our correct WAN address. Verify your unit is online by using your phone or a separate internet accessible device to access its WAN IP.
Firewall Setup
Easy CLI Import

Using the CLI button on the device manager menu will open access to the Orbit Router CLI or Command line interface. This isn’t necessary for setting up the firewall.
This is useful for entering script configurations that offer speedy deployment for complex configurations.
Type Config <hit enter>
Paste Script <hit enter>
Type Commit <hit enter>
Let’s review a BCI Firewall policy and compare with the Default GE Firewall policies. The BCI Firewall CLI Script used in this document can be found at the bottom of the guide.
Services/Firewall/Filter (Access Control list)
Here are policy comparison of the Default Firewall verses BCI’s Alternative firewall.
*The reference field indicates which Interface the filter is active on.

IN_TRUSTED - BCI Policy:
DROP all if source or destination is a DROP_LIST address.
ACCEPT ICMP if source is a LOCAL-NETS address.
ACCEPT TCP from all sources if port range is 502-503.
ACCEPT TCP from LOCAL-NETS for services HTTPS & SSH
DROP ALL from ALL.
* 502-503 is Modbus protocols, if you are using a different protocol you’ll want to modify or remove this rule.

IN_TRUSTED – GE Default Policy:
ACCEPT all from all.
*Comparison only.

IN_UNTRUSTED - BCI Policy:
DROP all if source or destination is a DROP_LIST address.
ACCEPT UDP DNS if source to all Destinations.
ACCEPT ICMP Echo Reply from CELL-IP sources to all destinations.
ACCEPT ICMP Echo Request from CELL-IP sources to all destinations.
ACCEPT TCP from CELL-IP for services to HTTPS, Netconf, SSH ports.
ACCEPT UDP from CELL-IP for services to dns, ike, ntp.
ACCEPT esp from CELL-IP for all destinations.
DROP all from all.

IN_UNTRUSTED – GE Default Policy:
ACCEPT ICMP form all to all.
ACCEPT UDP DNS service to all destinations.
ACCEPT TCP all sources to HTTPS, Netconf, ssh destination ports.
DROP all to all.
*Comparison only.

OUT_TRUSTED - BCI Policy:
1. DROP all address sources or destinations on DROP_LIST
2. ACCEPT all from all.

OUT_TRUSTED – GE Default Policy:
1. ACCEPT all from all.
*Comparison only.

OUT_UNTRUSTED - BCI Policy:
1. ACCEPT all address on CELL-IP to all destinations. (Add interface address True)
2. DROP GRE from all from all.
3. DROP all to all.

OUT_UNTRUSTED – GE Default Policy:
1. ACCEPT all address on CELL-IP to all destinations.
2. DROP all from all.
3. DROP all from all.
*Comparison only.

Services/Firewall/address set (IPV4)
Address Sets allow you to use a group name in firewall policies where you can add multiple address separately.
CELL-IP address set
Setup all cellular IP address that will be used within the VPN and that are trusted.
Example: I’ve included our local WAN (50.88.10.202) as well.
*By adding your WAN IP, it ensures only your location can access the router interface via public internet.

DROP-LIST address set
Use to add an untrusted device address. Adding an IP to this policy will ensure it’s traffic is dropped off all interfaces.
This is ideal blocking devices that shouldn’t or do not need to be accessing our local or cellular network.

LOCAL-NETS address set
Setup for all trusted local networks. All VPN network address should be included added here.
Example: If we were going to add a 3rd VPN site or SITE_C we would want to include it’s IP of 172.1.3.0/24 also.
Once our device is secured and our firewall properly configured, we are ready to move forward with the VPN setup.
Site to Site VPN Setup
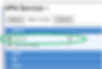
Services/VPN Service/Basic Config/ Enabled
By default, the VPN Service is disabled. Enabling before your policies are configured will result in an error.
Once you’ve setup both IKE and IPSEC policies you’ll need to ensure you enable the service.
Click the Enable Box to Turn on the VPN Service.

Services/VPN Service/Basic Config/ IKE
Click the check box for IKE to Enable this feature.
IKE POLICY
SETUP FOR
VPN-SITEA-83

Click ADD Button on Policy Details.
Setup a Policy NAME that helps identify the tunnel.
In this example our first tunnel will be to SITE B so I’m using the name: IKE_Policy_Site_B
Click ADD to save the Policy Name and to Expand additional IKE Policy setup.
*Use any scheme you want but I prefer to name to connection point.

IKEV Version: IKEV2 is recommended as it includes more flexibility then IKE1, uses less bandwidth and includes automatic keep alive.
Auth Method: Choose Pre-shared-key
Pre-Shared Key: Enter a case sensitive and secure password.
*Secure password to protect tunnel, must match on another tunnel end.
Once finished, we can add our Ciphersuite by clicking ADD.

Type a NAME for IKE Ciphersuite and hit ADD to proceed.
Example: we are using cs1
*Recommend treating as case-sensitive.
The Ciphersuite defines how strong we will encrypt and HASH our Internet Key exchange. The larger the Cipher the more bandwidth required.
Encryption Algorithm: aes256-CBC
MAC Algorithm: sha256-hmac
DH Group: dh14
Leave everything else as default. Once completed, Hit FINISH to complete.

We see our newly created IKE_Policy showing now.
Click ADD to continue with setting up the IKE Peer Policy.
*If you try to commit you will receive an error. You’ll need to finish the Peer polity before commit our changes to the Orbit.
IKE PEER
SETUP FOR
VPN-SITEA-83

Click ADD under Peer to expand peer naming.
· ADD a IKE Peer name.
In this example we are using a similar format to our IKE Policy name. hit ADD to expand PEER policy setup.

IKE Policy: Select recently created IKE_Policy_Site_B Policy.
IKE Endpoint Type: Leave as default (ANY)
IKE Identity Type: Leave as default (Default)
IKE Endpoint Type: Choose Address
Address is WAN IP (Static) of remote site.
IKE Identity Type: Leave as default (Default)
Role: Change to Initiator
Initiator Mode: always-on
Hit FINISH AND COMMIT to complete and save IKE Peer Policy Setup.
*Leave everything else as default.

We should now show both IKE Policy and Peer Policies.
Now let’s setup IPSEC.
IPSEC Policy
SETUP FOR
VPN-SITEA-83

Expand IPSEC by clicking the Enable feature box.
Click ADD to continue with a IPSEC Policy NAME.
Enter a NAME matching IKE naming standard.
Example: IPSEC_Policy_site_B

Click ADD to continue with Ciphersuite details like our IKE policy done previously.

Choose a Ciphersuite NAME and Click ADD to continue.
*Recommend treating as case sensitive.

Ciphersuite Details may be different or matched to IKE policy.
Encryption Algorithm: aes256-cbc
MAC Algorithm: sha256-hmac
DH Group: dh14
Hit Finish Twice and continue with creating a Connection policy.
*Leave everything else as default.
IPSEC Connection
SETUP FOR
VPN-SITEA-83

Click ADD under Connection.
Type a NAME and continue by hitting ADD at the bottom.
Hitting ADD will expand IPSEC Connection Details setup.

IKE Peer: Choose IKE Peer policy. Example: IKE_PEER_SITE_B
IPSEC Policy: Choose IPSEC policy. Example:IPSEC_Policy_SITE_B
Remote IP Subnet: Remote LAN network address and CIDR subnet. Example: 172.1.2.0/24 (SITE B Network)
Connection Type: Choose Net to Net
Local IP Subnet: Local LAN network address and CIDR Subnet. Example: 172.1.1.0/24 (SITE A Network)
Filter (Firewall policy for IPSEC Connection)
Example: Inbound Firewall Filter: Default policy (IN_TRUSTED)
Example: Outbound Firewall Filter: Default policy (OUT_TRUSTED)
HIT FINISH and COMMIT to save and complete the Orbit SITE_B tunnel addition.
Now that we’ve created our IKE and IPSEC policies on our SITE A radio you can enable the VPN Service. The next piece will cover the SITE A termination onto our SITE B Remote Orbit.
SETUP OF
VPN-SITEB-81
(Remote IKE Setup)
Adding our second end of the tunnel will be very similar how we configured Site A. The only difference will be in the IKE Peer and IPSEC Connection policies our IP address and networks will be flipped.

In this example since Site B is connecting to Site A as will other additional VPN remotes, we will reference the point of connection.
Our Site B remote will have a Site_A policy since that’s where it’s terminating.

We want to match our policy and Cihpersuites to the setup of Site A into our configurations on Site B.
IKEV2 to match site A
Auth Method to match site A
Pre-shared key to match site A

We will click ADD and match our Site A Ciphersuite details also.
Encryption Algorithm: aes256-CBC (Match)
MAC Algorithm: sha256-hmac (Match)
DH Group: dh14 (Match)
FINISH to save.
We can now move onto creating our IKE PEER policy.
ADD and setup a new IKE Peer policy. Select recently created IKE_Policy_Site_A

IKE Endpoint Type: Leave as default (ANY)
IKE Identity Type: Leave as default (Default)
IKE Endpoint Type: Choose Address
Address is WAN IP (Static) of primary site. (Site_A)
IKE Identity Type: Leave as default (Default)
Role: Change to Initiator
Initiator Mode: always-on
*Leave everything else as default.
Hit FINISH AND COMMIT to complete and save IKE Policy Setup.

Here is our completed IKE policies for Site_B remote.
We can now proceed to setting up IPSEC.
SETUP OF
VPN-SITEB-81
(Remote IPSEC Setup)
Setup the IPSEC Policy by matching the Site_A Policy.

In this example we use the NAME: IPSEC_Policy_Site_A
We match Ciphersuite name as: cs1
We match Ciphersuite settings:
Encryption Algorithm: aes256-CBC (Match to Site A)
MAC Algorithm: sha256-hmac (Match to Site A)
DH Group: dh14 (Match to Site A)

Setup the IPSEC Connection Policy using the opposite setup to Site_A Radio.
IKE Peer: Choose IKE Peer policy.
Example: IKE_PEER_SITE_A
IPSEC Policy: Choose IPSEC policy. Example: IPSEC_Policy_SITE_A
Remote IP Subnet: Remote LAN network and CIDR subnet. Example: 172.1.1.0/24 (SITE A)
Connection Type: Choose Net to Net
Local IP Subnet: Local LAN network address and CIDR Subnet.
Example: 172.1.2.0/24 (SITE B)
Match Site_A firewall rules (default)
HIT FINISH and COMMIT to save and complete the Orbit SITE_B tunnel addition.

We can now start testing our tunnel and or performing some basic trouble shooting. If everything work correct our tunnels should start trying to connect.
REMOTE
LAN ACCESS
If the tunnel is working, we should be able to access the remote device by it’s local IPSEC network address.
In this example our 172.1.1.0/24 network should be able to access 172.1.2.0 and 172.1.3.0 networks once added.

In this example, I’m connected to the 172.1.1.0/24 network using a computer address of 172.1.1.100/24.
My computer gateway is configured to the Orbit Router 172.1.1.1/24.
I can hit both my local Orbit Web interface at 172.1.1.1 and off-site remote of 172.1.2.1/24. Make sure your computer gateway is configured to it’s Orbit and any other interfaces are disabled such as Wi-fi.
Review of
Encrypted Traffic

Here’s an example of Encrypted IPSEC data. This was generated using the Orbit’s TCPDUMP CLI feature on the Cellular interface. This is what the public sees when we connect to our remote, poll data or do anything else over the IPSEC tunnel.
Review of
IKE/IPSEC Exchange

Here’s an example of our IKV2 and then IPSEC Exchange when the tunnel initializes.
If any part of this fails to complete there is a configuration problem.
Troubleshooting

Verify you can also ping the LAN address. If not, Ensure NAT MASQ isn’t enabled on Cellular interface. Also ensure Cellular IP are static, correct, and reachable as well.

If your device does not automatically attempt to establish a IKE connection, check your Initiator role in IKE policies (both sides). Ensure both ends are Initiators to ensure they will always try to connect.

Here’s an example of the tunnel establishing its connection. If this fails, it will go blank and try again in a couple minutes. If it attempts to connect but fails, re-confirm your remote and local IP address to ensure they are correct on each side.
Adding Another Tunnel
Now that you’ve masted setting up a single POINT TO POINT, to add a second tunnel you will just duplicate what you’ve done on Site_A and Site_B modifying the PEER and Connection end point address, local and remote networks.
In this Example we would add a IKE_Policy_Site_C, IKE_Peer_Site_C and IPSEC_Policy_Site_C and IPSEC_CONN_SITE_C onto our existing SITE_A Orbit.
*The Orbit is not a front-end router, and we should minimize the amount of tunnel terminations to around 15 depending on their network load.
On our new SITE_C remote we would match Site_B only changing our IP specific information and creating a similar policy IKE_Policy_Site_A, IKE_Peer_Site_A ETC. This is in line with our naming standard mentioned earlier in this guide.
GE Orbit CLI Scripts
ADDRESS SETS:
set services firewall enabled true
set services firewall address-set CELL-IP addresses [ 50.88.10.202/32 166.155.25.81/32 166.155.25.83/32 ]
set services firewall address-set DROP_LIST addresses [ 192.0.0.0/8 ]
set services firewall address-set LOCAL-NETS addresses [ 172.1.1.0/24 172.1.2.0/24 ]
IN_TRUSTED:
set services firewall filter IN_TRUSTED rule 1 match src-address
set services firewall filter IN_TRUSTED rule 1 match src-address address-set DROP_LIST
set services firewall filter IN_TRUSTED rule 1 match src-address add-interface-address false
set services firewall filter IN_TRUSTED rule 1 match dst-address
set services firewall filter IN_TRUSTED rule 1 match dst-address address-set DROP_LIST
set services firewall filter IN_TRUSTED rule 1 match dst-address add-interface-address false
set services firewall filter IN_TRUSTED rule 1 actions
set services firewall filter IN_TRUSTED rule 1 actions action drop
set services firewall filter IN_TRUSTED rule 2 match protocol icmp
set services firewall filter IN_TRUSTED rule 2 match src-address
set services firewall filter IN_TRUSTED rule 2 match src-address address-set LOCAL-NETS
set services firewall filter IN_TRUSTED rule 2 actions
set services firewall filter IN_TRUSTED rule 2 actions action accept
set services firewall filter IN_TRUSTED rule 3 match protocol tcp
set services firewall filter IN_TRUSTED rule 3 match dst-port
set services firewall filter IN_TRUSTED rule 3 match dst-port port-range 502 to 503
set services firewall filter IN_TRUSTED rule 3 actions
set services firewall filter IN_TRUSTED rule 3 actions action accept
set services firewall filter IN_TRUSTED rule 10 match protocol tcp
set services firewall filter IN_TRUSTED rule 10 match src-address
set services firewall filter IN_TRUSTED rule 10 match src-address address-set LOCAL-NETS
set services firewall filter IN_TRUSTED rule 10 match dst-port
set services firewall filter IN_TRUSTED rule 10 match dst-port services [ https ssh ]
set services firewall filter IN_TRUSTED rule 10 actions
set services firewall filter IN_TRUSTED rule 10 actions action accept
set services firewall filter IN_TRUSTED rule 13 match protocol all
set services firewall filter IN_TRUSTED rule 13 actions
set services firewall filter IN_TRUSTED rule 13 actions action drop
OUT_TRUSTED:
set services firewall filter OUT_TRUSTED rule 1 match src-address
set services firewall filter OUT_TRUSTED rule 1 match src-address address-set DROP_LIST
set services firewall filter OUT_TRUSTED rule 1 match src-address add-interface-address false
set services firewall filter OUT_TRUSTED rule 1 match dst-address
set services firewall filter OUT_TRUSTED rule 1 match dst-address address-set DROP_LIST
set services firewall filter OUT_TRUSTED rule 1 match dst-address add-interface-address false
set services firewall filter OUT_TRUSTED rule 1 actions
set services firewall filter OUT_TRUSTED rule 1 actions action drop
set services firewall filter OUT_TRUSTED rule 10 match protocol all
set services firewall filter OUT_TRUSTED rule 10 actions
set services firewall filter OUT_TRUSTED rule 10 actions action accept
IN_UNTRUSTED:
set services firewall filter IN_UNTRUSTED rule 1 match protocol all
set services firewall filter IN_UNTRUSTED rule 1 match src-address
set services firewall filter IN_UNTRUSTED rule 1 match src-address address-set DROP_LIST
set services firewall filter IN_UNTRUSTED rule 1 match src-address add-interface-address false
set services firewall filter IN_UNTRUSTED rule 1 match dst-address
set services firewall filter IN_UNTRUSTED rule 1 match dst-address address-set DROP_LIST
set services firewall filter IN_UNTRUSTED rule 1 match dst-address add-interface-address false
set services firewall filter IN_UNTRUSTED rule 1 actions
set services firewall filter IN_UNTRUSTED rule 1 actions action drop
set services firewall filter IN_UNTRUSTED rule 2 match protocol udp
set services firewall filter IN_UNTRUSTED rule 2 match src-port
set services firewall filter IN_UNTRUSTED rule 2 match src-port services [ dns ]
set services firewall filter IN_UNTRUSTED rule 2 actions
set services firewall filter IN_UNTRUSTED rule 2 actions action accept
set services firewall filter IN_UNTRUSTED rule 3 match protocol icmp
set services firewall filter IN_UNTRUSTED rule 3 match icmp-type echo-reply
set services firewall filter IN_UNTRUSTED rule 3 match src-address
set services firewall filter IN_UNTRUSTED rule 3 match src-address address-set CELL-IP
set services firewall filter IN_UNTRUSTED rule 3 match src-address add-interface-address false
set services firewall filter IN_UNTRUSTED rule 3 actions
set services firewall filter IN_UNTRUSTED rule 3 actions action accept
set services firewall filter IN_UNTRUSTED rule 4 match protocol icmp
set services firewall filter IN_UNTRUSTED rule 4 match icmp-type echo-request
set services firewall filter IN_UNTRUSTED rule 4 match src-address
set services firewall filter IN_UNTRUSTED rule 4 match src-address address-set CELL-IP
set services firewall filter IN_UNTRUSTED rule 4 match src-address add-interface-address false
set services firewall filter IN_UNTRUSTED rule 4 actions
set services firewall filter IN_UNTRUSTED rule 4 actions action accept
set services firewall filter IN_UNTRUSTED rule 9 match protocol tcp
set services firewall filter IN_UNTRUSTED rule 9 match src-address
set services firewall filter IN_UNTRUSTED rule 9 match src-address address-set CELL-IP
set services firewall filter IN_UNTRUSTED rule 9 match dst-port
set services firewall filter IN_UNTRUSTED rule 9 match dst-port services [ https netconf ssh ]
set services firewall filter IN_UNTRUSTED rule 9 actions
set services firewall filter IN_UNTRUSTED rule 9 actions action accept
set services firewall filter IN_UNTRUSTED rule 10 match protocol udp
set services firewall filter IN_UNTRUSTED rule 10 match src-address
set services firewall filter IN_UNTRUSTED rule 10 match src-address address-set CELL-IP
set services firewall filter IN_UNTRUSTED rule 10 match dst-port
set services firewall filter IN_UNTRUSTED rule 10 match dst-port services [ dns ike ntp ]
set services firewall filter IN_UNTRUSTED rule 10 actions
set services firewall filter IN_UNTRUSTED rule 10 actions action accept
set services firewall filter IN_UNTRUSTED rule 11 match protocol esp
set services firewall filter IN_UNTRUSTED rule 11 match src-address
set services firewall filter IN_UNTRUSTED rule 11 match src-address address-set CELL-IP
set services firewall filter IN_UNTRUSTED rule 11 actions
set services firewall filter IN_UNTRUSTED rule 11 actions action accept
set services firewall filter IN_UNTRUSTED rule 12 match protocol all
set services firewall filter IN_UNTRUSTED rule 12 actions
set services firewall filter IN_UNTRUSTED rule 12 actions action drop
OUT UN_TRUSTED:
set services firewall filter OUT_UNTRUSTED rule 1 match protocol all
set services firewall filter OUT_UNTRUSTED rule 1 match src-address
set services firewall filter OUT_UNTRUSTED rule 1 match src-address address-set CELL-IP
set services firewall filter OUT_UNTRUSTED rule 1 match src-address add-interface-address true
set services firewall filter OUT_UNTRUSTED rule 1 actions
set services firewall filter OUT_UNTRUSTED rule 1 actions action accept
set services firewall filter OUT_UNTRUSTED rule 2 match protocol gre
set services firewall filter OUT_UNTRUSTED rule 2 actions
set services firewall filter OUT_UNTRUSTED rule 2 actions action drop
set services firewall filter OUT_UNTRUSTED rule 10 match protocol all
set services firewall filter OUT_UNTRUSTED rule 10 actions
set services firewall filter OUT_UNTRUSTED rule 10 actions action drop